How To Keep Curly Wig Looking Wet
Are you wondering why your curly wig is always dry and tangled?
Well, the answer is simple. Your curly wig lacks moisture. You will learn how to give your curly wig that wet look by adding moisture as we proceed in this article.
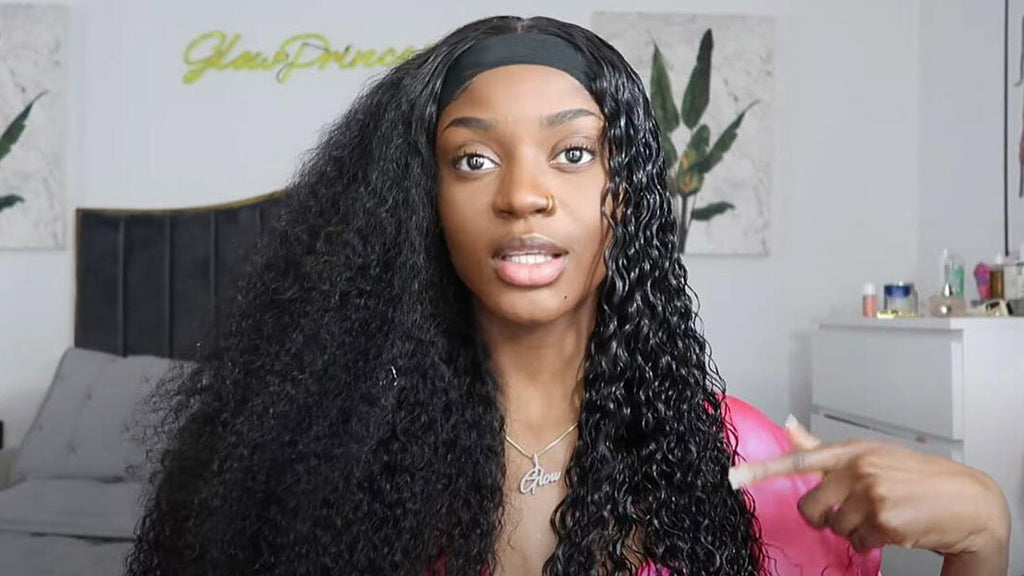
Curly wigs are everyone’s favorites all the time, and we understand why.
They are versatile wigs and can make their wearers stunning no matter how styled. You can easily pop it on your head and already have an elegant look.
While they have the power to change your appearance, these wigs get tangled or loosened easily. But the wet-look hairstyle is a secret to keeping them in shape. How? Let’s find that out in this article.
The wet look is a trendy hairstyle among girls who love long curly wigs. It’s gorgeous and looks super cool. If this is also your style, come with us as we tell you how to keep your curly wigs looking wet.
Option One
The goal for this option is hydration and curl definition. Using this method, you need to, first hydrate your wig. The goal is to dampen your hair with water, then set or define the curls with a gel.
@_.havana The wet look on curly hair🤩 @ISEEHAIR #wiginstall #wetlook #curlyhair #iseehair #frontal #wig ♬ Snoop Dogg x Pharrell x ROMderful. - So Future
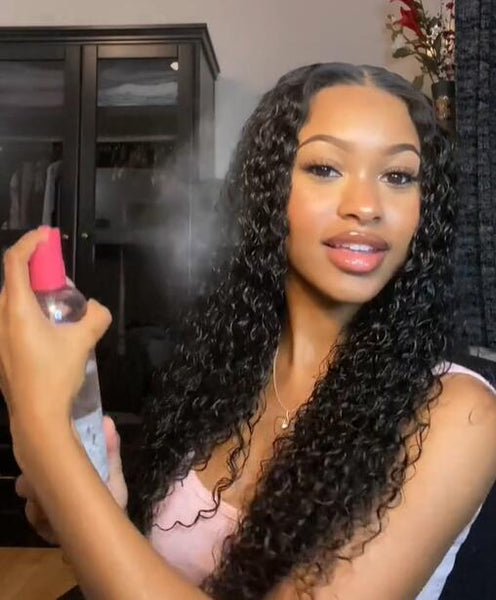
You can also use a glossy spray to add more shine to your curly wig. See the step-by-step process below.
Step 1: Damp your hair with water
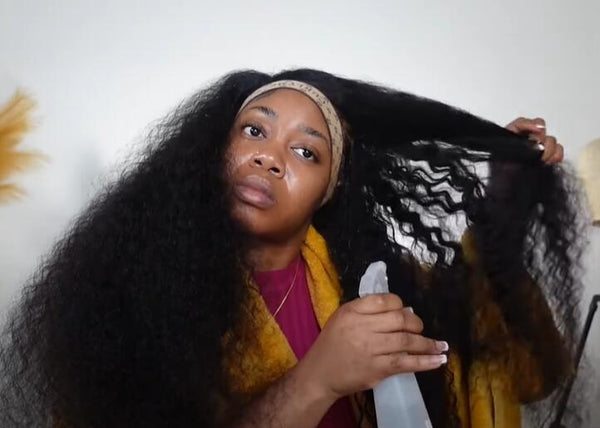
If you want to achieve the ideal wet-look hairstyle, the first thing to do is to dampen your hair with water.
Remember, it does not have to be dripping wet. Make sure you only get the wig saturated enough to hold the gel. That’s because if it is soaking wet, the gel may not stick as it should.
Preferably, use a spray bottle to dampen the curly wig. If yours has gotten too wet, allow it to air dry before you move further.
Step 2: Detangle the wig
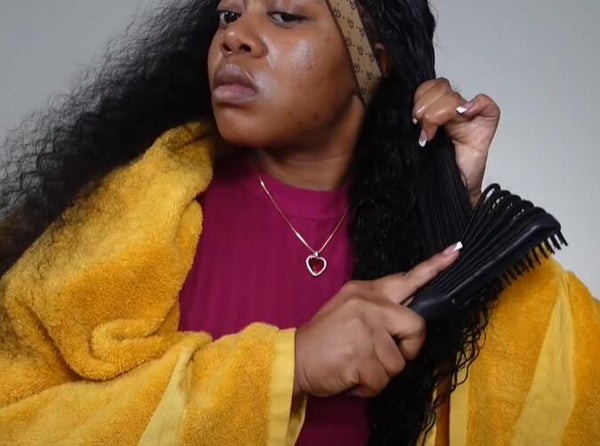
Again, your curly wigs are more prone to tangles than straight hair. You wouldn’t want it tangled up while you go around your day. So, pick up a brush and detangle your wig.
You can make use of a wide-tooth-comb for this. It does the work properly and reduces breakage. Start from the ends and comb your way to the roots. You will be reducing breakage if you follow this method.
For every knot, if there are, use your fingers to detangle them. Surprisingly, our fingers are tools that help with detangling a wig.
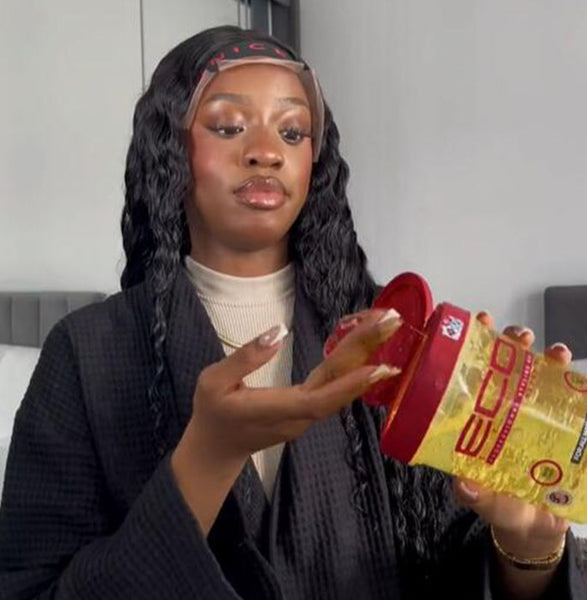
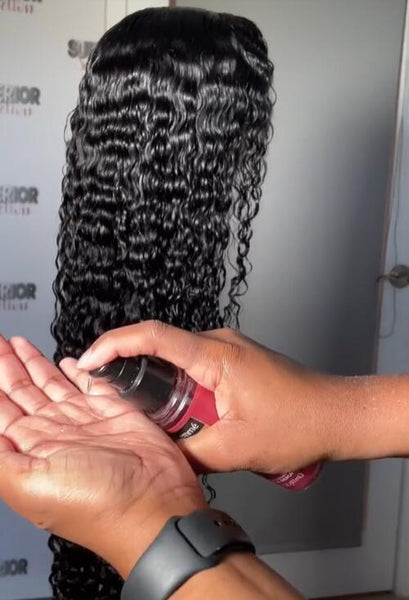
Step 3: Choose a gel
You have to pick the appropriate gel for your curly wig. Using a suitable gel is a step further to achieving the perfect wet-look hairstyle. It means you can’t use any gel type if you don’t want your wig to be sticky.
A good buy would be a non-sticky, hair-shine hair gel. It will keep the wig wet and in place. We won’t recommend any other type apart from this.
Pro tips: If you don't have a gel at hand, leave in conditioner, foam, or hair mousse are also good choices, all of them can moisturize your curly hair and help to define the curls.
Please note: While applying, use the right amount of hair gel. You want to avoid causing clumps in your wig by using a lot. Still, the quantity of the gel you will use depends on your wig’s length and density.
Step 4: Apply gel to your curly wig
Now that you have gotten a suitable gel, it’s time to start applying. As we mentioned earlier, you do not need to use a lot. However, make sure it gets saturated.
Start from the roots and move to the lengths of the wig. You should focus more on the roots to get the ideal look.
After you’ve applied the product, check how it feels with your palm. You can go all over again if it appears not to be enough. Still, don’t apply too much.
Step 5: Comb your wig

Once you are satisfied with the outcome, comb your wig to achieve what you want. It implies that different combs can help you achieve different looks. So, know the look you want and choose the appropriate comb.
For instance, a fine-tooth comb helps achieve a more relaxed appearance. But a boar bristle brush gives a polished, sleek, and perfected look. So, choose wisely.
As you comb, start from the root and move to the tip. It’ll help perfect the style you are confident and comfortable with.
Step 6: Spritz on a glossing spray
You’ve focused on the roots, and that is great. Let’s transfer the work to the rest of the wig. Use a glossing spray to blend your roots to the ends. Although the gel did a magnificent job, the glossing spray adds the finishing touches. It adds a wet-looking shine to your curly wig, makes it not too heavy, and perfects the look.
Step 7: Style your curly wig
If you have gotten here, finish your look by styling the wig. Do this according to your taste and preference. Add some clips, tie a scarf, or leave it flowy. It’s always good to follow your overall look for the day. You can end the process with a hair spray to keep your hair intact.
Option Two
It’s lovely to have a gorgeous style like this. But since curly wigs are high maintenance, it's always better to follow through the whole hair care process. Here’s another method that takes you through that.
However, you won’t need a hair gel for this method. If you are searching for other styling products that keep curly hair looking wet, check out the steps below.
Step 1: Wash your wig
Washing your wig helps you maintain it and keep it fresh.
- Fill a sink or bowl with warm water.
- Add a sulfate-free shampoo with lots of hair care ingredients and place your into the mixture.
- Gently wash the wig lightly in the water and squeeze it out after it is neat (Do not squeeze tightly)
- Rinse with water and squeeze it out again. Be careful as you do.
Step 2: Detangle your curly wig
Detangling keeps your wig from tangling up. While you will need lots of time by your side, it’s worth it. So, divide your hair into sections and start combing from the tip.
- You can make use of a wide-tooth comb. It helps with detangling your wig well.
- Be gentle as you comb your way through. You don’t want your hair to lose its shape.
- Make use of your fingers to loosen every knot you come across.
Step 3: Do a deep Conditioning treatment
Your wig gets tangled up due to many reasons. However, deep conditioning can help keep it at bay.
- So, stick to deep conditioning your hair once before and after you wear it.
- Use products like natural oils and conditioner.
- Do this once a week: soak your wig in warm water, apply hair products, and massage it gently, working your way from the tip to the root.
- Let it sit for some minutes to absorb the conditioner.
- First, rinse with warm water. Then rinse with cold water.
- Using a lot of hair spray can lead to tangling, so restrain from applying a lot.
- Lastly, carefully use a tower to squeeze out the excess water before leaving it to dry.
Step 4: Let Your Wig Air Dry
Let your wig dry naturally after washing your wig. That’s because heating tools like blow dryers and curling irons can cause frizziness and dryness. You want to avoid it as much as you can. So, dry in a cool room.
Step 5: Apply Hair Mousse or Cream
Your hair can keep looking wet if you apply a hair mousse or cream to it. The cream helps it to maintain the curl style. So also does the mousse.
There are different curl cream and mousse products you can opt for. The Cantu coconut curling cream, Schwarzkopf foam mousse, and SheaMoisture Coconut & Hibiscus Curl Enhancing Smoothie are a few to check out. They should help define your curls and maintain the wet look when completely dry. Whichever products you finally pick, be sure they are water-based because they will not weigh down your hair.
Step 6: Apply Curly Hair Oil
For the flat look and to seal everything you’ve done, pick an oil designed for curly hair and apply it. Olive oil, jasmine, argan, or coconut oils are good oils you can use. Apply a little; you don’t want your hair to attract dust.
The oils can also add extra shine to your hair, give it a soothing fragrance, and keep it healthy.
Step 7: Comb Your Curly Wig
Once you’ve applied a little oil, comb your hair from the root to the ends. Make sure it is not tangled before you start combing this way. You can use different combs to achieve different looks. So, choose the comb and use it. After combing, let the hair sit for a while. You want it to get dry before you start styling it.
Step 8: Style as You Wish
After it is dry, style the way you want. Your wig should be looking wet and ready for some styling. So, style it in a ponytail, make an updo style, or leave it to blow in the wind.
Both options work great depending on your preference.
What You Should Not Do to Your Curly Unit?
Many people struggle with their curly wigs because it doesn’t like what they imagined. That doesn’t have to be you. Avoid doing the following to keep your curly wigs looking nice and fresh.
1. Do not overwash your hair. Always remember to be gentle while you wash.
2. Always use little but adequate natural oils on your hair.
3. Keep shampoos that contain sulfates far from you. They are not the best for our natural hair so avoid using them on your units too.
4. Never comb your hair while it is still dripping wet.
5. Do not use any other type of towel except soft cotton, satin, or a microfiber towel.
Conclusion
While people are worried about what products can keep their curly unit looking wet, rest assured that the products mentioned can help you achieve a wet look on your curly wig. However, each has its benefits and limitations.


Leave a comment