How to Install a 360 Wig?

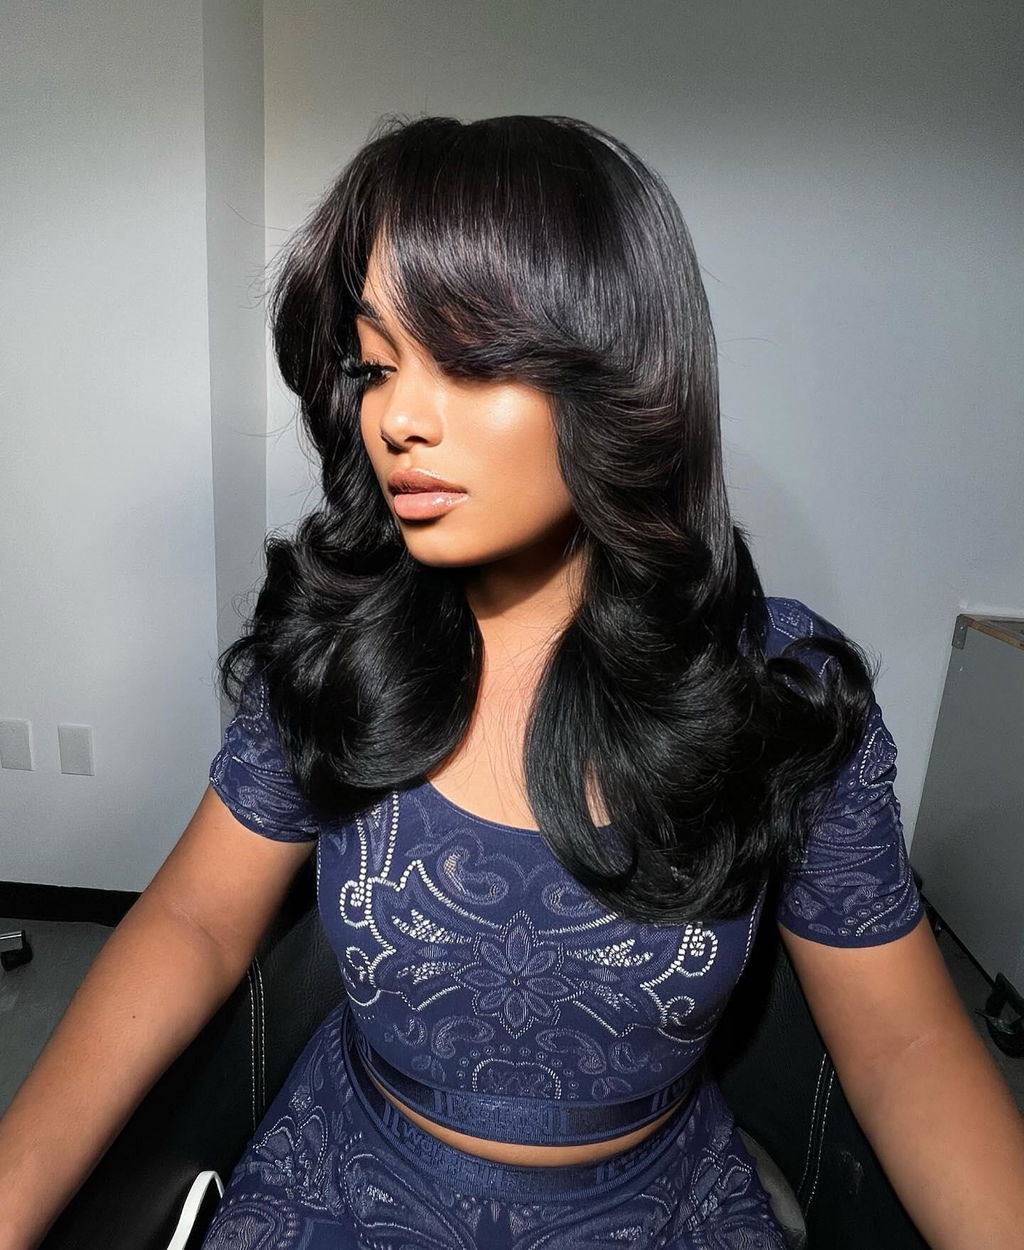
A 360 wig is beautifully designed with lace around the perimeter of the cap, so you can achieve a more realistic-looking hairline that looks extremely natural from any angle. What sets it different from other lace wigs is its unparalleled styling versatility — think sky-high ponytails, buns, or sophisticated slick-back looks, all without a fuss.
When applied properly, a 360 lace wig can give you the illusion that the hair is actually growing out of your head.
This step-by-step guide is a comprehensive 'How To Install 360 Wig' with everything you need to know, from body preparation to installation, and how to achieve a secure look.
Essential Tools & Products for a Flawless Install
However, before we delve into how to install a 360 wig, you will need to have all the necessary tools and products to perform a perfect 360-degree wig installation.
1. Wig Selection and Specs

For a flawless finish, begin with the perfect foundation. For a natural look and OOTD Instagram, 180%–200%+ density can give you that high-glam, Insta-ready look with plenty of lift. Please pay close attention to the lace because it helps a lot to make your wig sit on the scalp.
When choosing these, never forget to measure your head circumference, as a well-fitted cap prevents lifting and ensures all-day comfort.
2. Essential Tools and Accessories

It's the non-negotiable point that every wig user wants a smooth base. In this process, usually nylon wig caps work great to produce a sleek profile and a mesh cape for better breathability.
To make your partings precise, it's best to use sectioning clips or rat tail combs. Throughout that process, remember that edge bush also plays a vital role in blending your natural baby hairs into the new design.
3. Adhesives & Customization
● Select your hold:

If you are running out of time, then wig tape works great because it is quick and easy to remove, but also has the option to use wig glue to make a long-term deal.
● Prep the skin:

Always use an alcohol wipe and a scalp protector to prevent head-wig irritation and ensure a strong, lasting bond.
● Match your tone:

Use a foundation or lace tint to blend your mesh with your natural skin beautifully. This process makes your wig undetectable and gives a seamless look.
● The final touch:

Apply an edge control gel to completely lay your hair and ensure professional, polished results.
Preparing Your Natural Hair and Scalp
Preparing your natural hair and scalp before applying a 360 wig is essential. That small step ensures the wig stays secure and protects your hair and natural skin from unwanted damage.
1. Scalp Cleansing and Protection

Remember, the proper scalping process begins by removing any oils, sweat, or buildup, usually caused by using hair products. This small but crucial step ensures a better hold for adhesives and reduces the risk of irritation, particularly if you are a long-term wear user or live in a warm environment.
2. Hair Preparation Techniques

A flat foundation is the primary key when installing a wig 360. Usually, it has straight back cornrows or flat braids that work excellently because they easily distribute hair and lie comfortably under a wig cap.
If you have short hair, just brush your hair all together and do a mini low bun, done!
A lightweight gel or styling foam also helps tame flyaways and make hair shorter. Running your hands through your hair first reveals lumps or rough patches - these matter when fitting the wig later.
3. Mapping Your Hairline and Ear Tabs
Precisely mapping your hairline represents a more realistic look. For this, first identify your natural features, like your widow's peak and temple curves, to guide placement. While installing, also mark the center point to ensure the wig is symmetrical.
Step-by-Step 360 Wig Installation
1. Positioning the Wig

Before putting on the wig, you can choose to wear or not to wear a wig cap.
First, begin by placing the wig carefully. Align the center part in the middle of your face to ensure that the ear tabs sit flat, even on both sides.
Then secure the inside combs and adjustable band. After doing this step, check the tension around the edges to make sure it's not too tight, and sit perfectly. Feeling a problem. Also, have the option to use temporary clips to hold it in place.
2. Cutting the Lace

Cutting the lace requires perfection and tolerance, as a simple mistake can make your 360 wig unusable.
For this, use a small, sharp pair of scissors to produce a soft and natural edge. For better accuracy, cut at a slight angle close to the hairline. As we know, lace cannot be reused once removed, so take your time with careful cuts.
If you install a pre-cut lace 360 wig can skip this step.
3. Applying Adhesive or Tape

Apply adhesives in sections, like starting at the front hairline and expertly moving to the back. That process ensures that your wig remains consistent.
For higher area tension, you can also use lace tapes. Allow the glue to become tacky before attaching the lace, as this improves grip and prevents slipping on the scalp.
If you are working with a Cynosure 360 wig with elastic and drawstrings, you can be happy to skip this step.
Cost and Pricing for 360 Wig Installation
1. Average Cost of a 360 Wig

While buying the wig, the price is the first factor that you may have to face. In the market, human hair 360 wigs are more expensive than the synthetic ones. They can be easily styled at high heat and stay longer.
The type of lace also affects the price: HD laces are the most expensive due to their seamless, sun-like appearance, while Swiss and transparent laces are affordable options. Higher densities and longer lengths also impact the cost.
2. Installation Cost Breakdown
Installation costs always differ between DIY and professional applications. A DIY installation saves your labor costs but requires other supplies like glue, tape, scalp prep products, and styling tools.
Remember, professional installation costs include customization services like plucking the hairs, shopping for your custom design, or tinting the lace for realistic results.
3. Factors That Affect the Total Cost
What you pay for a wig 360 often ties back to who made it, where the hair comes from, and how the glue is designed. In which stronger adhesives cost more up front, and they also offer a long-lasting hold. A well-made, reusable wig360 can easily reduce your long-term costs and works excellently when properly maintained.
Styling Your 360 Wig
1. Heat Styling
In fashion, heat styling is used to transform 360 wigs from casual to polished. In which soft curls and loose waves offer a natural movement, while sleek and straight styles make the lace work well.
To maintain hair quality, always use a heat protectant and also work in small sections at a moderate temperature. Folks often overlook this - skipping heat protectant before styling might describe how long your wig lasts.
2. Updos and Ponytails
Starting strong- what makes a 360 wig stand out is how fluently it fits different styles. You're making sure the front doesn’t shift loose if you don't have a tight ponytail. Pay attention here, if it's too tight, then you have to face an irritation problem.
3. Prevention of Styling Damage
Buildup from products can make the hair look dull and less flexible. To protect your wig, limit high-heat styling and rotate in low-manipulation styles.
4. Accessorizing
A fresh vibe can come from small extras you wear. Think scarves, clips, or a band across the forehead - little things that shift the whole feel. Without turning on a styling tool, these pieces bring change. They nudge your appearance forward, quietly matching what's happening now. So choose the accessories that effortlessly complement your face shape and enhance your 360 wig.
Maintenance, Aftercare & Longevity
1. Daily Care Routine
It's best to stick with the small day-to-day stuff, wigs, snatch a satin bonnet or scarf in the evening, that will save you from rubbing, and both the wig and your own hair will be.
One or two strokes of the brush in a hurry will keep you out of tangles without straining. Attach any loose ends and check the hairline before going to bed so that the wig is comfortable and clean.
2. Washing & Conditioning
Wash it according to how often you use it, not daily. Typically, weekly or, better still, every two weeks is sufficient to have a wash. Use lukewarm water and sulfate-free shampoos to ensure you do not dry it up. Upon conditioning, wipe the additional water rather than rubbing it strongly.
Lasting freshness is best accomplished by air-drying; however, the freshness can be accelerated through a dryer on low heat, just in case you are in a hurry.
3. Adhesive Refresh Cycle
The adhesives begin to loosen as time goes by. When you see any lifting, please refresh it with a bit of glue or tape and some tricks for removing it carefully so that you do not tear the lace. To ensure the skin is happy and irritation is low, do not wash the scalp too often.
4. Storage & Preservation
To keep the wig longer, it must be stored. It is maintained in shape with a wig stand and allowed to air out, preventing moisture and smell. Store travel bags, but when they need to be used long-term, place them on a stand in a superb, dry location.
Glueless 360 Wig: Is It Worth Trying?

If you are a newbie or a lazy girl, the answer is Yesss! The structure of glueless 360 wigs is delicate. For example, Cynosure Hair's glueless 360 wigs come with pre-bleached knots, pre-plucked and pre-cut lace, a removable elastic band, and invisible drawstrings. You can achieve the dream of putting on the wig and going.
No unfitted wig cap worries, no allergic to glue worries.
In a Nutshell
A 360 wig features lace around the entire perimeter of your scalp, creating a natural look from every angle. Unlike traditional lace wigs, it offers flawless flexibility for high ponytails and buns. Because of that considerable versatility, 360 wigs are becoming the first choice for beginners and professional stylists.
When installed correctly, the 360 wig blends seamlessly with the scalp and also mimics natural hair growth. So don't waste the moment and make your next festival like what you imagine.


Leave a comment