How To Thin Out A Wig Correctly?
"A friend recently purchased a wig for the first time. While she loved the length and style, she didn’t like the density. It was too much and made the wig look unnatural on her head, what should she do?" One customer asked, well, my advice to her was to thin it out.
Do you have a wig like this as well? Is it too full and compact? If yes, then all you need to do is thin it out. And this tutorial is for you!
Is it necessory to thin out a wig?
Thinning out a wig can give you the ideal density you want. It will reduce the hair’s volume and make it look more natural. You can work on both human hair wigs and synthetic wigs.
There are two options to think out your wig. You can either give it to a professional stylist or do it yourself.
Thinning out your wig yourself is easy. You can get it done in the simple steps listed below.
Tools You Will Need
1. A wig stand
2. A wig mannequin
3. Hair clips
4. Brush or comb
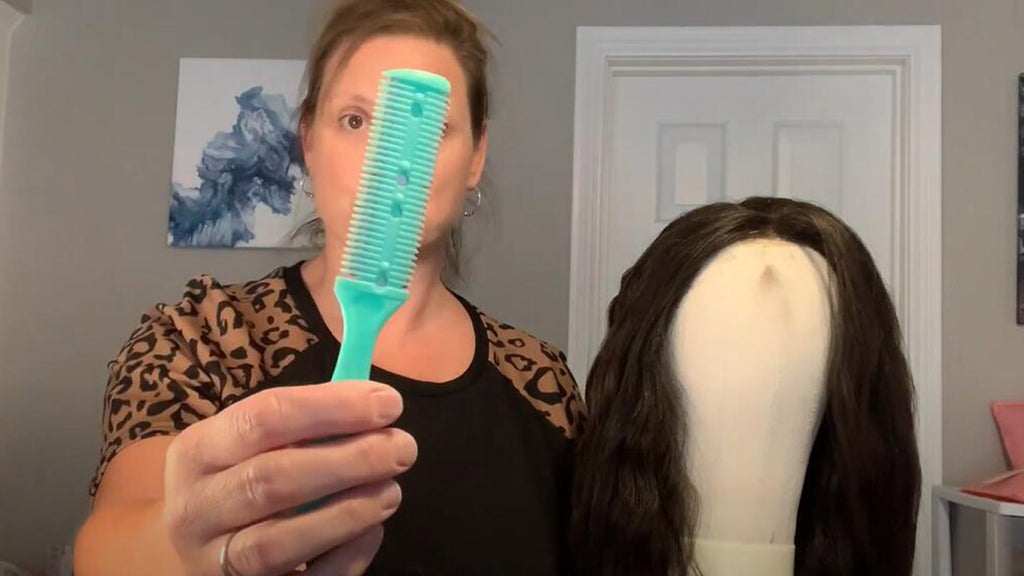
5. Razor comb or thinning shears
Different people use various techniques and tools to thin out their wigs. However, we will show two simple ways to get it done quickly. So, don't panic, follow our steps!
Method 1: The Razor Comb Method
This method uses the razor comb to take out excess hair. This is usually done in sections for a cleaner appearance.
Thin out your wig using the razor comb method in the following steps.
Step 1: Secure your wig on mannequin head
Set your wig stand and place the mannequin head on it. Be sure it's well set before placing your wig on the head. Then place your wig on the mannequin head and prepare it for the thinning process.
Step 2: Section the hair
Start creating the sections you will work on. But first, divide the front section of the wig out as you won't be thinning those areas. This is to make sure it covers up the back section, balancing it out.
The back section can be divided into rolls. If it is much fuller, divide it into rolls and further divide it into two parts.
Pin the front section so it doesn't disturb, plus any other area you are not thinning at the moment.
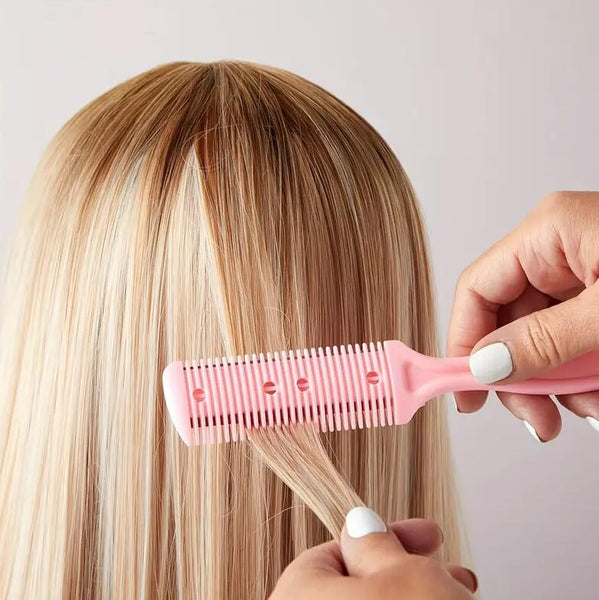
Step 3: Start thinning out the hair
With your razor comb placed a little further away from the base of the hair, slide down your razor comb to remove some density. Now, with your comb or brush, get the cut hair out.
Another way you can do this is to place the brush just right beneath the razor comb. Slide both down to get the thinning hair out. Remember, never go up to the base of the wig because it's the thinnest part of the wig.
Step 4: Repeat this process to other sections of hair
Repeat the previous step till you've covered the down part of the wig. While you thin it out, make sure to brush through occasionally to be sure you're not outrightly cutting out the wig.
Method 2: The Thinning Shears Method
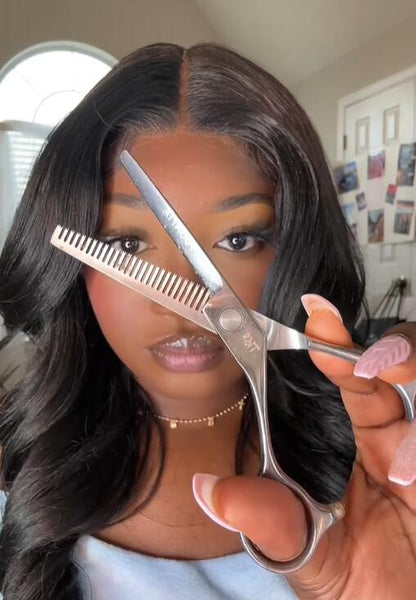
This works like the razor comb method. The difference is that you are using a shear (this works like a scissors). If you are not used to working with a razor comb, then this method is great for you.
Step 1: Place your wig on mannequin head
As we did in the previous method, set up your wig stand and mannequin head. I consider this much easier to work with than placing the wig on your head.
Step 2: Divide hair
Pin the top layer away from the rest of the wig. Then, divide to form different sections to make it simpler.
Step 3: Cut 2-3 times depend on the length of your wig
Pick a section, comb through it, and start thinning the wig. It's better to work in sections to keep things organized.
With the thinning shears, trim out the bulk hair. Place the thinning shears on an angle, just as you hold your scissors when cutting.
Start close to the root and cut. Move a little bit further and cut. You can cut through a few times until you get to the end.
Next, use a comb or brush to remove the excess hair.
Step 4: Finish all the bulk hair thin out
Using step three, thin out the bulk hair from each section. You can check to see if it's to your taste or if you'll need to thin it out some more.
Pro Tips and Tricks
1. Always split your hair into different sections before you start thinning it out. You can get a good result and avoid making mistakes if you do so.
2. Visiting a hair salon might be your best option if you're a beginner. However, the steps mentioned above are easy. Take your time and you'll get it in no time.
3. Remember to avoid trimming the top layer of the wig. You get the wig to balance out that way. It also helps prevent stray hairs.
4. If you'd like to trim the hair out in one go, put it on to avoid errors. You can check if it fits or still needs some thinning.
5. While you work on it, take a few breaks to see how it turned out. You want to make sure you don't cut too much hair.
6. Start thinning from the top of the weft, not the bottom. While it must not be too close to the outer layers, cutting from the ends of the wig won't give you the result you want.
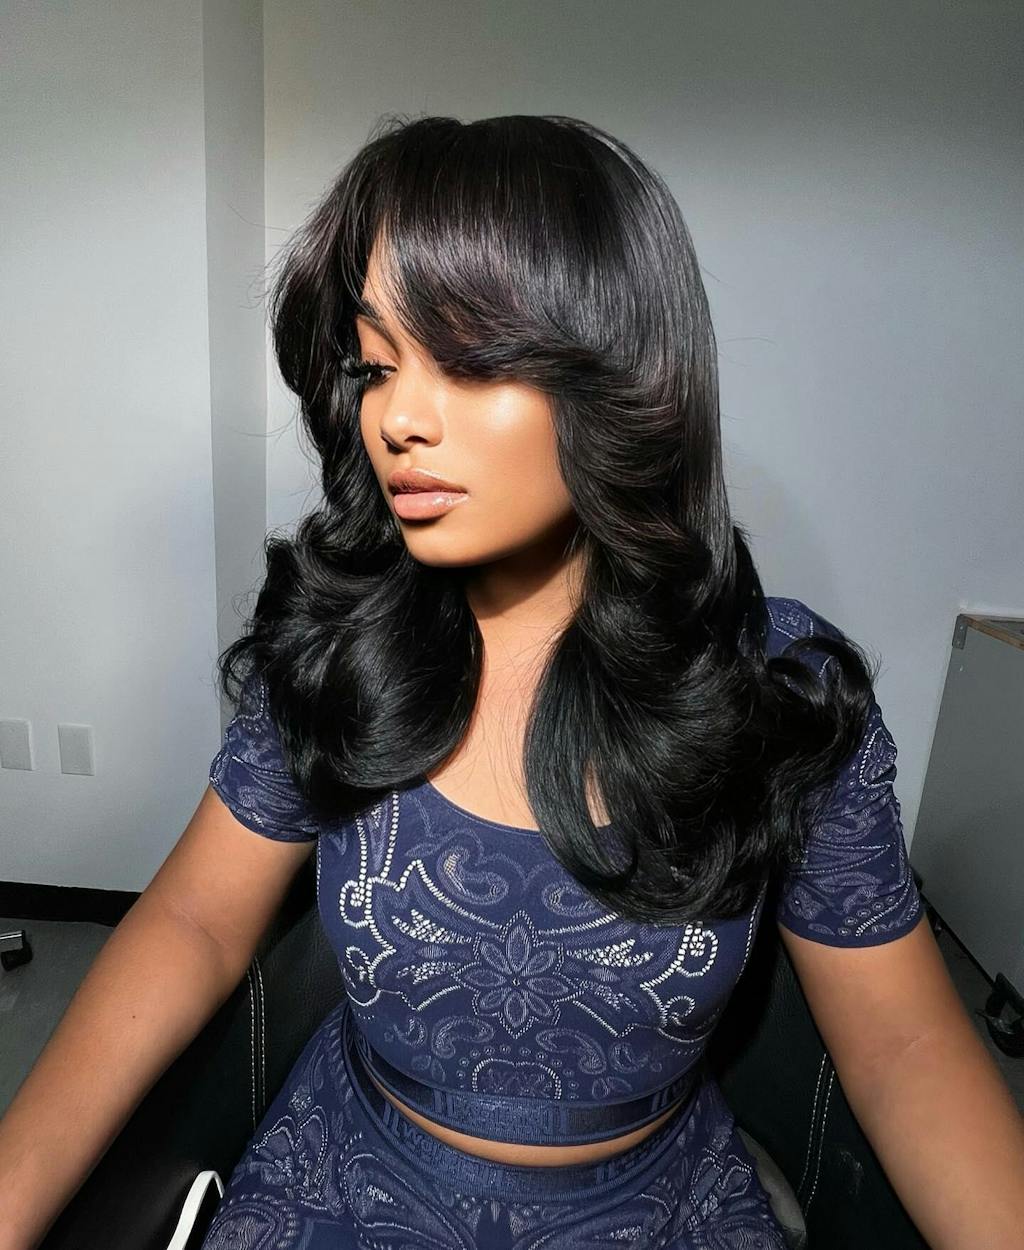
How to Thin Out Bangs on a Wig?

Apart from thinning wigs to appear natural, you might be interested in thinning out your bangs. So, let's see how you can do that in this section.
Step 1: Place your wig on a mannequin head
You want your wig to be on a stable platform that won't disrupt the thinning once you start. So, place it on a mannequin head and clip it onto it.
Step 2: Comb and flatten your bangs
Before you thin out, be sure to comb and straighten the bangs. You'll need your flat iron for this part. Make sure it's flat before you move to the following steps.
Step 3: Section the bangs
Since you're removing density, you'll need to section the bangs. Start from the inside out, like in layers. Pin the top layer of the bangs and start working from the bottom part.
Step 4: Thin it out
First, pick your flat iron and straighten it out the bangs. Take your thinning shears, place them on the bangs, clamp them down, and pull through. Go through the process over and over again till it thins out.
Be sure not to place the thinning shears on the top layer because that's the thinnest part of your bangs.
If you're wearing the wig, you may get some hair on your face so take note.
Step 5: Thin out the next section
Move on to the next part once you've thinned out the first section. With the thinning shears again, slide down the bangs to get some hair out.
You can further divide this into two or three parts if it's hard to get it in one go. Continue the process till you achieve the density you want.
Once that's all done, your bangs are all set!
Frequently Asked Questions about Thinning Wigs
1. Can I thin out the top section of a wig?
No, you can’t thin out the top section of your wig. Thinning out the middle or lower section of your wig balances everything and makes it not stick out. Plus, if there's an error, the top section can cover it up.
2. Can I thin out my wig?
Yes, you can. You can do this if your wig is too full. While it may be difficult, it'll be satisfying. You can get it to look more natural.
Consider giving it to a professional if you think you can't do a good job. You don't want to spoil a quality wig, costing you more in the long run.
3. What are the benefits of thinning out a wig?
There are so many benefits. While it's beneficial for a customer to have a full hair more than a scanty one, hair that's too full may not be what you want. You can thin it out to tick the vibe you are going for.
Moreover, the wig becomes more manageable and easier to style.
4. Can these methods be used with all wigs?
Well, yes. These methods are suitable for all hair types.
5. Are there other methods I can use to thin out my wig?
Yes, there are. A few other methods you can use are the regular scissors method and the twist technique.
If you do not have a razor comb or thinning shears, you can use a regular pair of scissors. However, I won't advise a beginner to use this.
Final Thoughts
Thinning out your wig is a way of reducing its volume to give it a natural appearance. For a more natural look, the ends of the hair should be thinner than the roots and the middle.
If you always prefer natural-looking hair, opt for a single-drawn rather than a double-drawn when buying a wig.
If you already bought a dense wig, follow the method above to thin it out. Your wig will come out the way you want it to.
Do let us know how it turned out in the comment section. Until next time!


Leave a comment